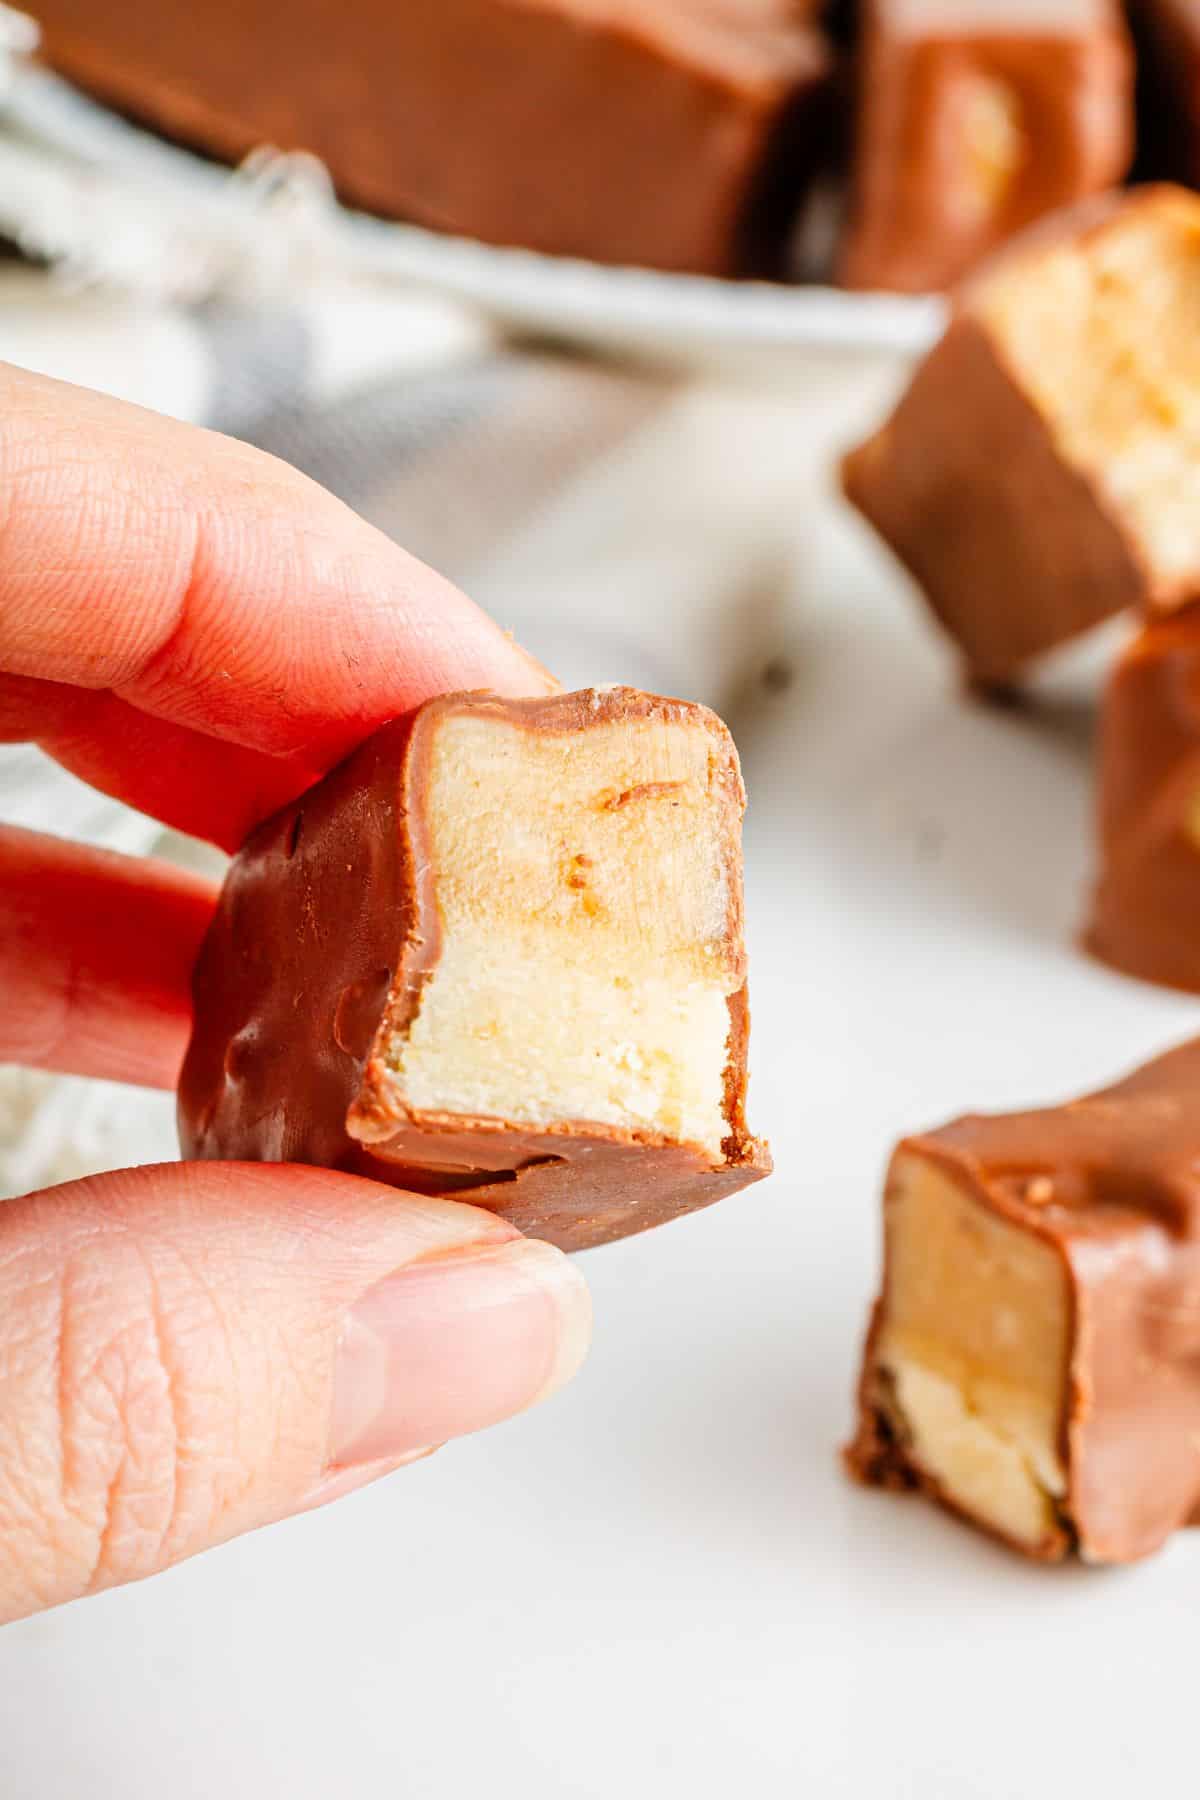
Homemade Healthy Twix Bars (high protein)
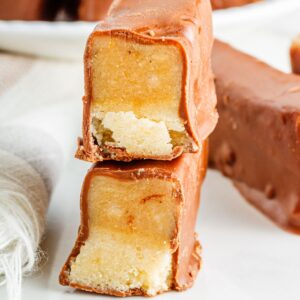
These Healthy Twix Bars will quickly become your go-to treat! Combining a rich chocolate and caramel layer with a crunchy shortbread cookie base, these bars offer healthy and nutritious twist on the classic Twix flavor.

This healthy twix recipe is a healthier version of everyone’s favorite candy bar, revamped for your sweet tooth but with wholesome ingredients.
The best part? Just like these protein peanut butter cups, they have added protein that you can’t even taste. Trust me, these bars are about to become your new go-to when that sweet craving hits. They remind me of my healthy millionaire bars – but with extra protein!
And if protein packed treats are your thing, you have to try these Biscoff Bites or pupkin spice protein bars next.
What You’ll Love About This Recipe
Recipe Ingredients
You’ll need the following ingredients to make these healthy homemade twix bars:
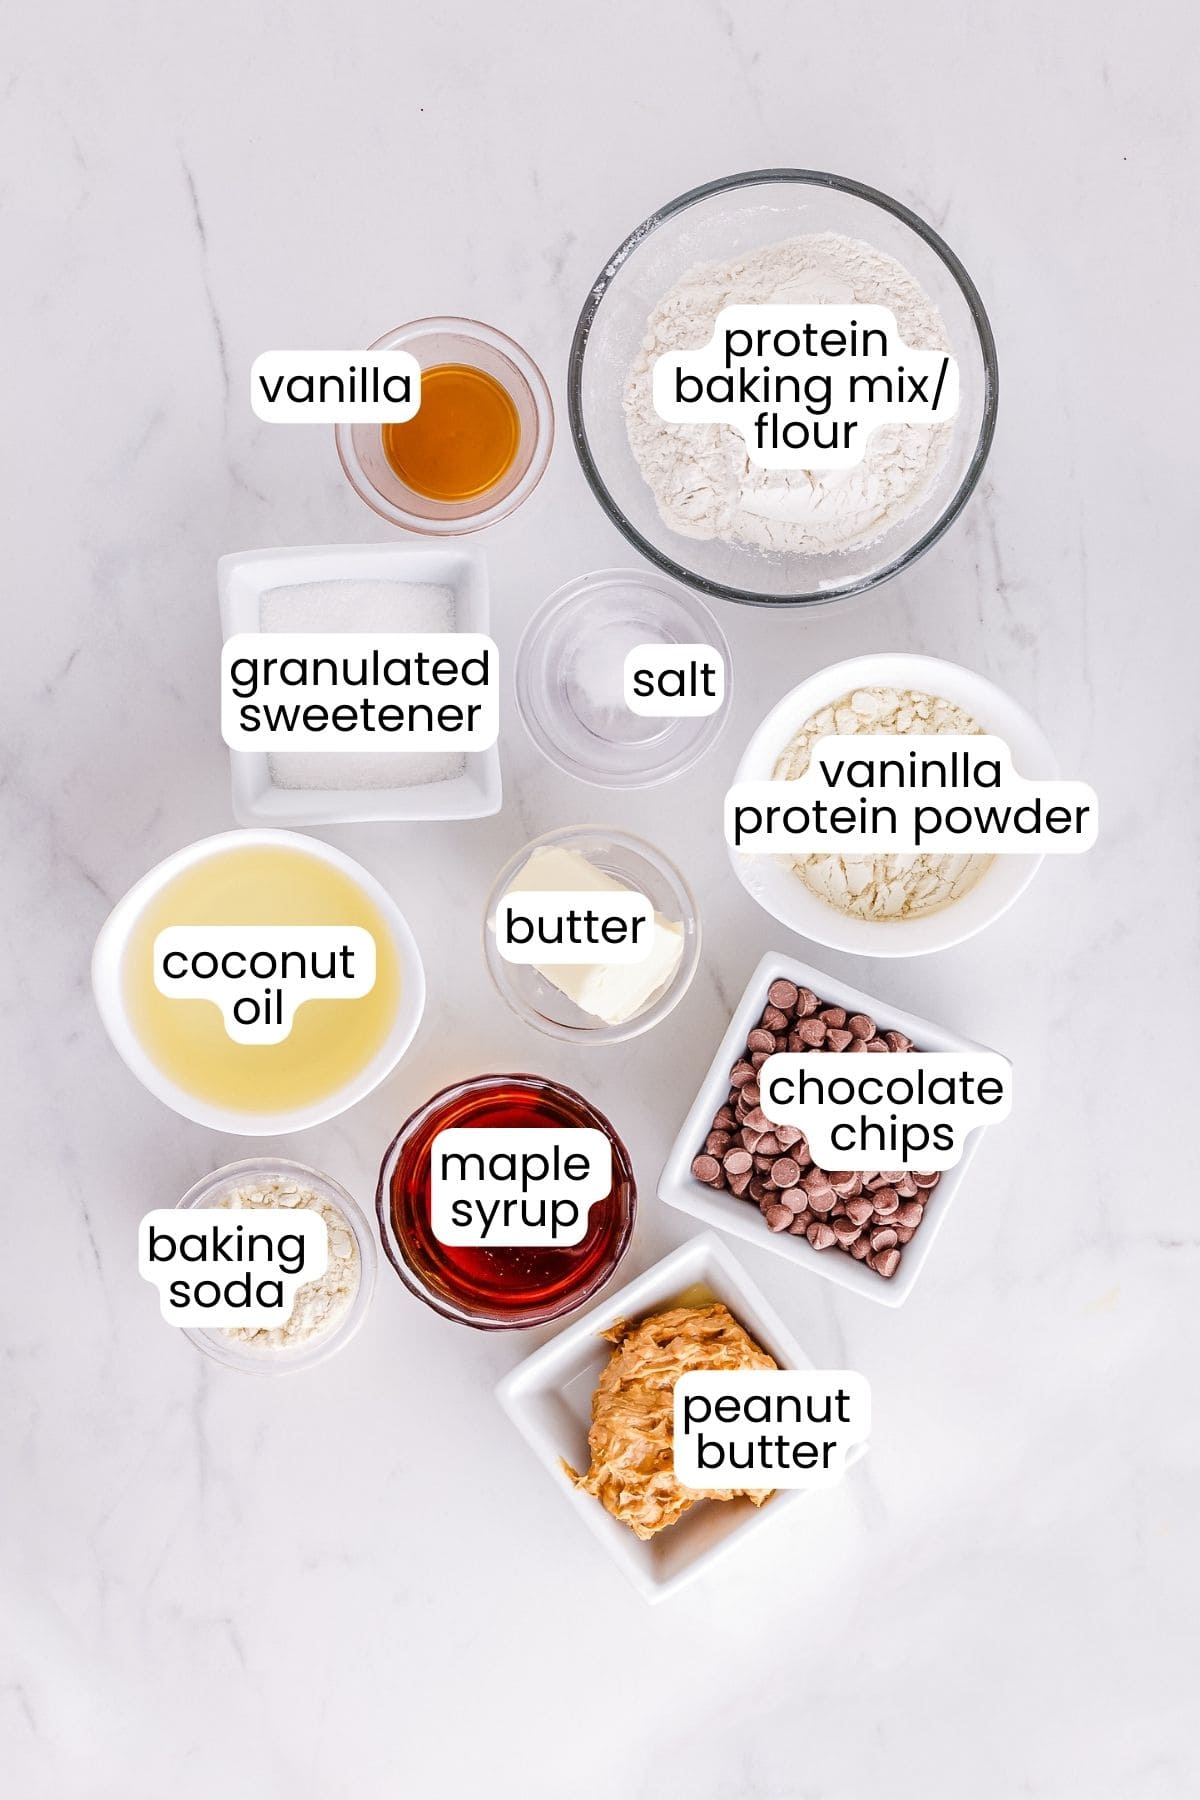
Protein Baking Mix/Flour: I used Quest Multipurpose Mix in place of regular flour in this recipe which reduces the carbs and increases the protein. You can get it at Walmart or on Amazon. You could also use regular flour.
Sweetener: I used Monkfruit sweetener but you can use regular white sugar if you prefer.
Sugar Free Maple Syrup: I used Lakantao Maple Syrup. You can also use pure maple syrup if you prefer.
Protein Powder: You may use another type of protein powder instead of whey, but they may absorb liquid differently. For the cookie mixture, you may need more butter and/or coconut oil. Using a protein powder other than whey protein shouldn’t affect the caramel mixture as much. My favorite is Clean Simple Eats.
Peanut Butter: You can use a different nut butter if you prefer, but I do recommend using a crunchy butter as opposed to a creamy peanut butter as it adds a nice crunchy texture! You can even switch things up and use almond butter or cashew butter.
Coconut Oil: You can use refined coconut oil (which has no coconut flavor) if you’re worried about your bars tasting too much like coconut.
Chocolate Chips: I love using dark chocolate chips for the chocolate topping, but feel free to use any type you like.
How to make Homemade Healthy Twix Bars: Step by Step
Here are quick visual instructions. Be sure to check out the full instructions with exact ingredients in the printable recipe card below.
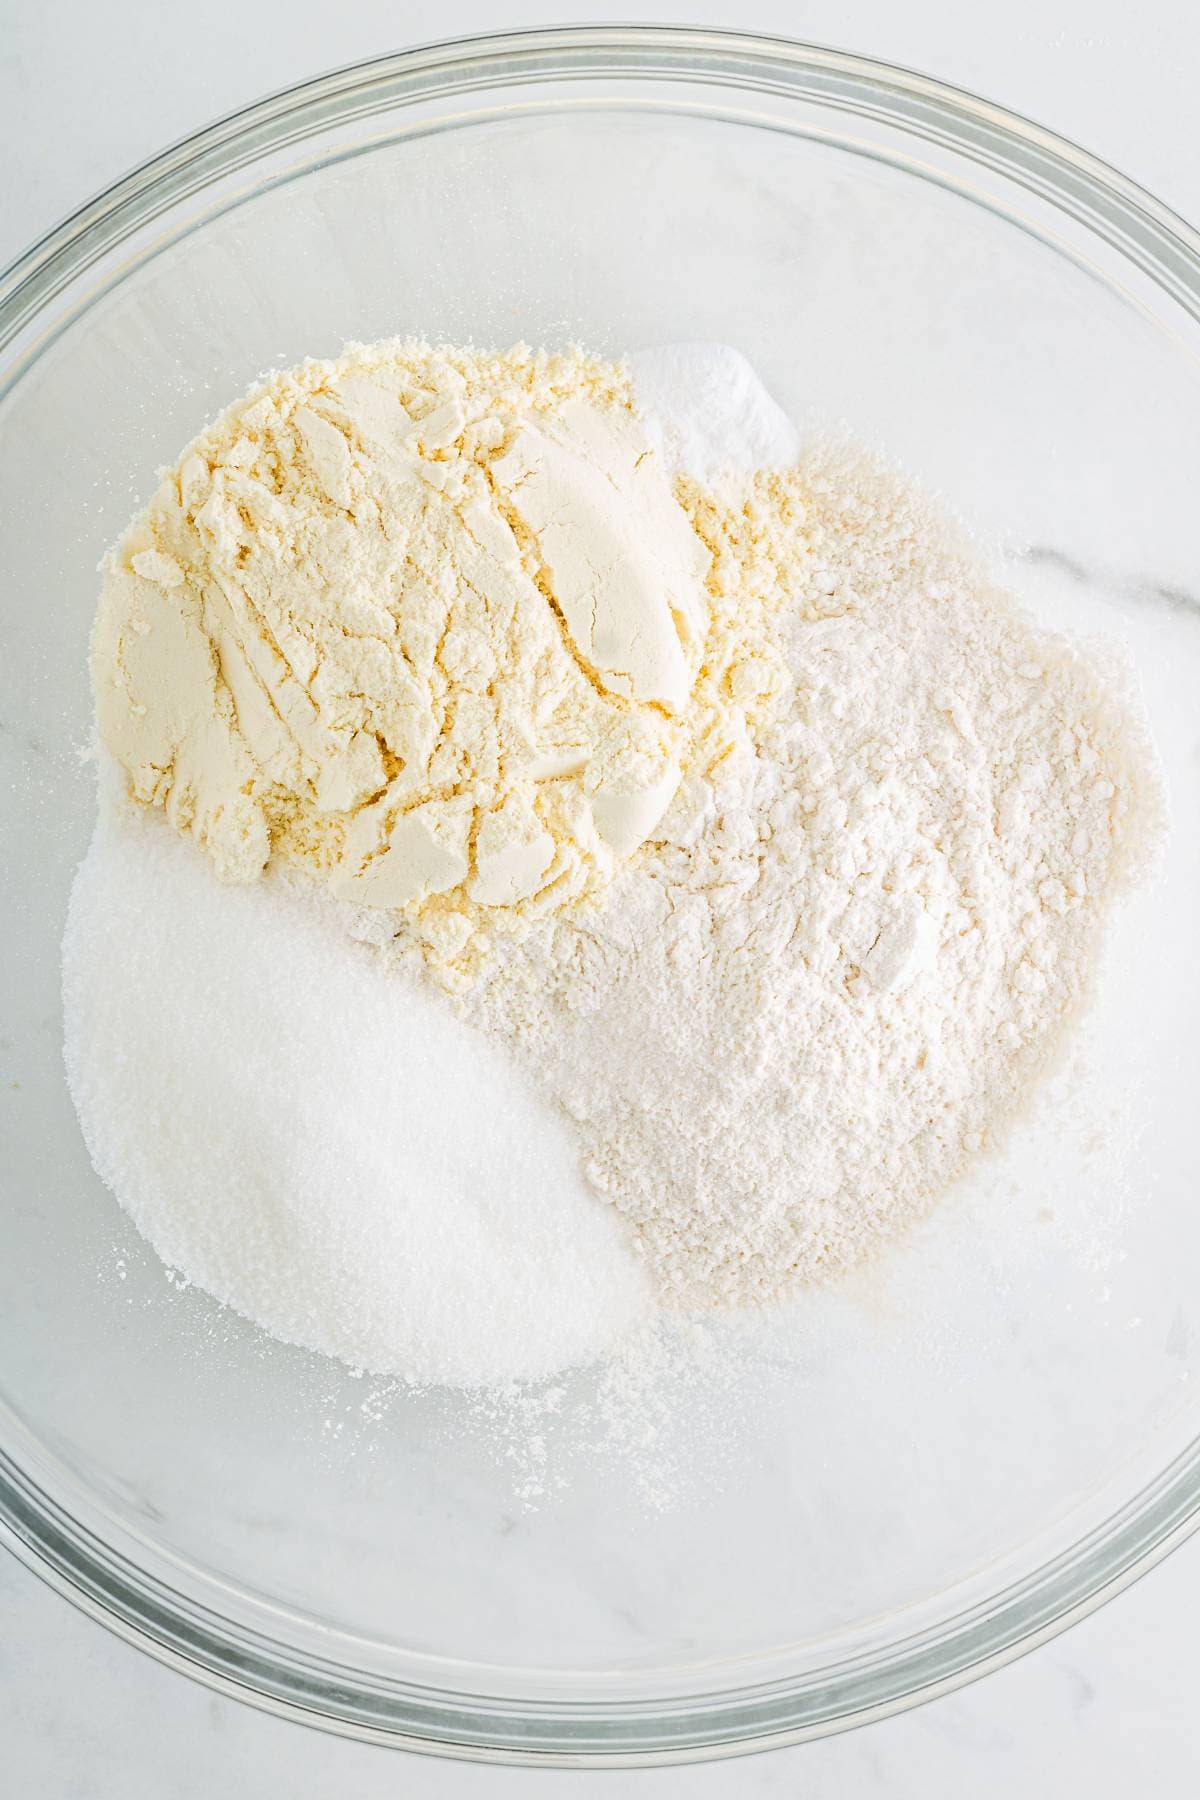
Step 1: In a large bowl, combine the flour, protein powder, sugar, salt, and baking soda
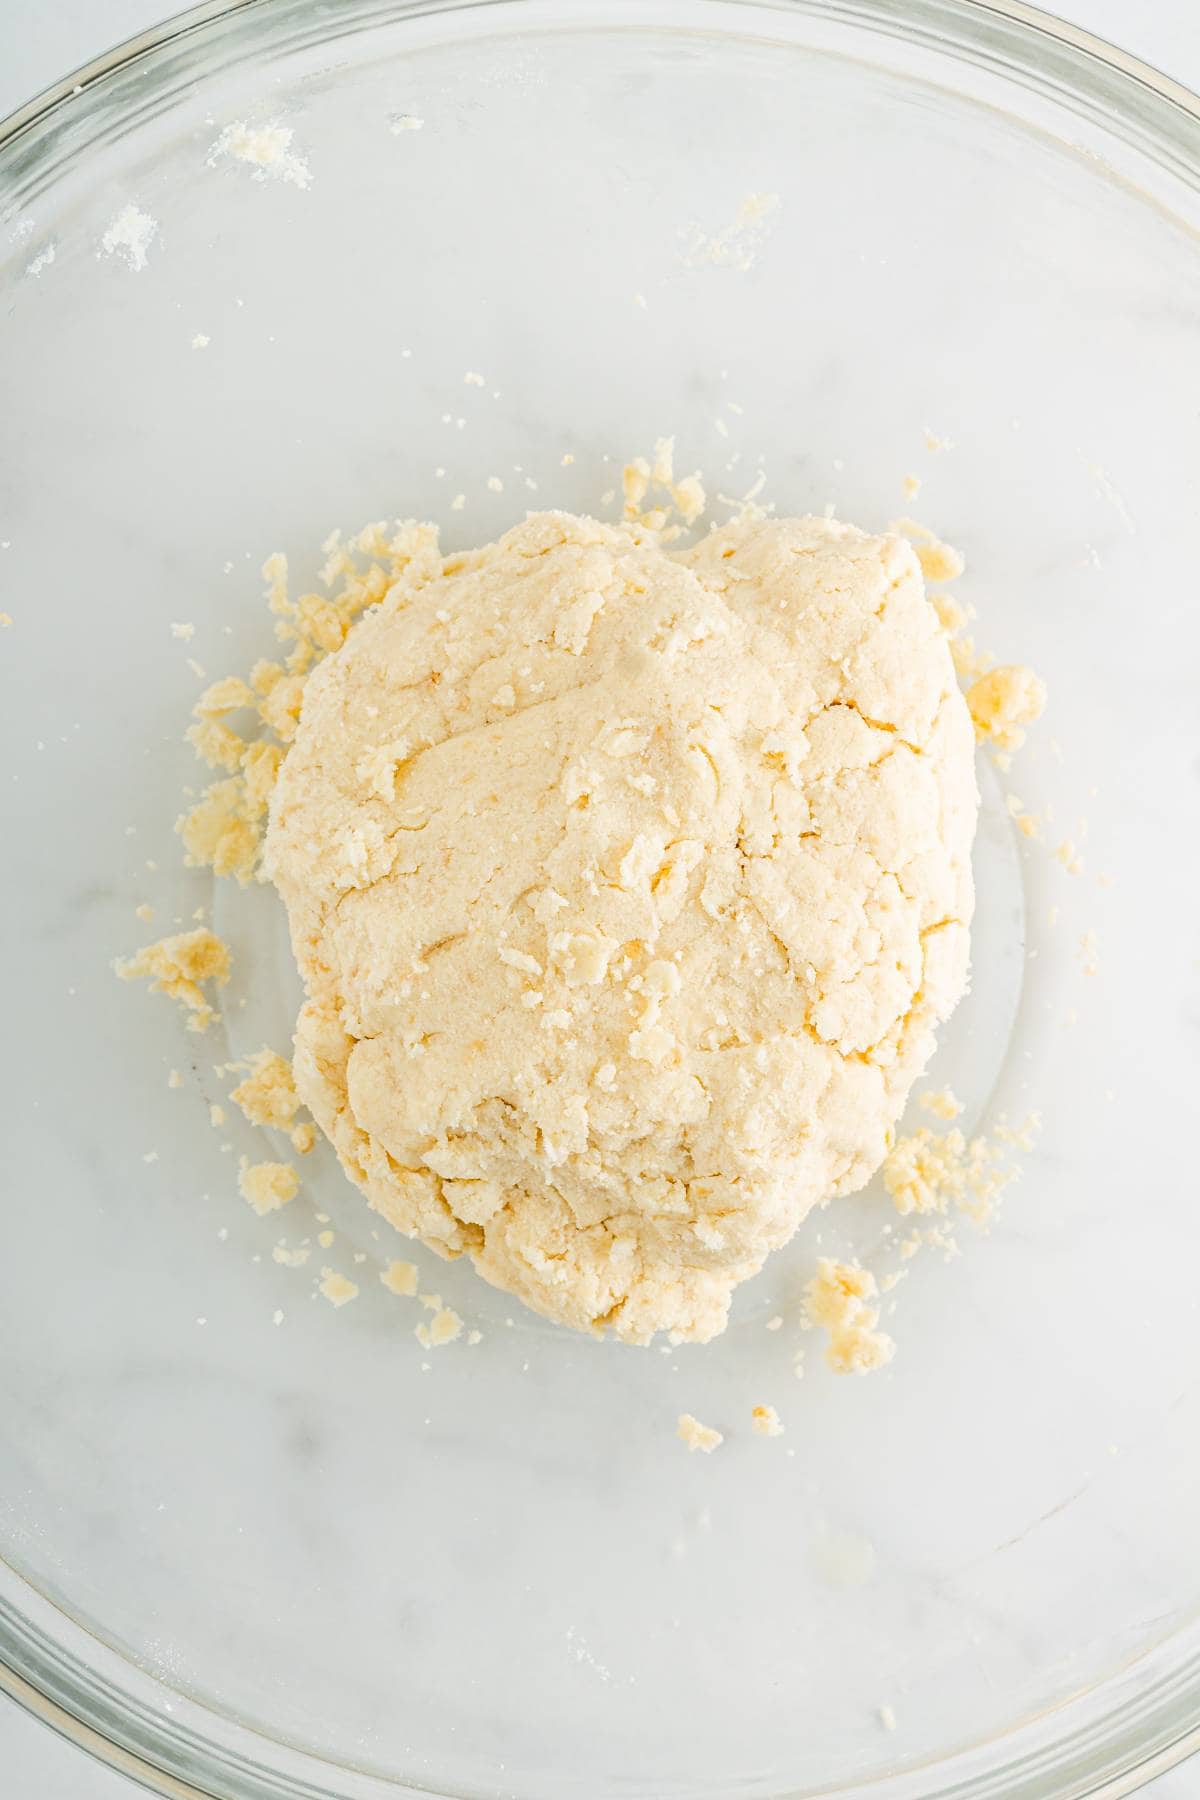
Step 2: Add the softened butter and vanilla extract and mix together with a fork until a crumbly dough forms. Add melted coconut oil 1 tablespoon at a time, mixing in between. Add just enough oil until you are able to stick the dough together into one big ball.

Step 3: Transfer the dough to the parchment lined baking dish and press the dough down evenly across the pan.

Step 4: Place in the oven and bake for 13-15 minutes, until the edges just turn slightly golden brown.
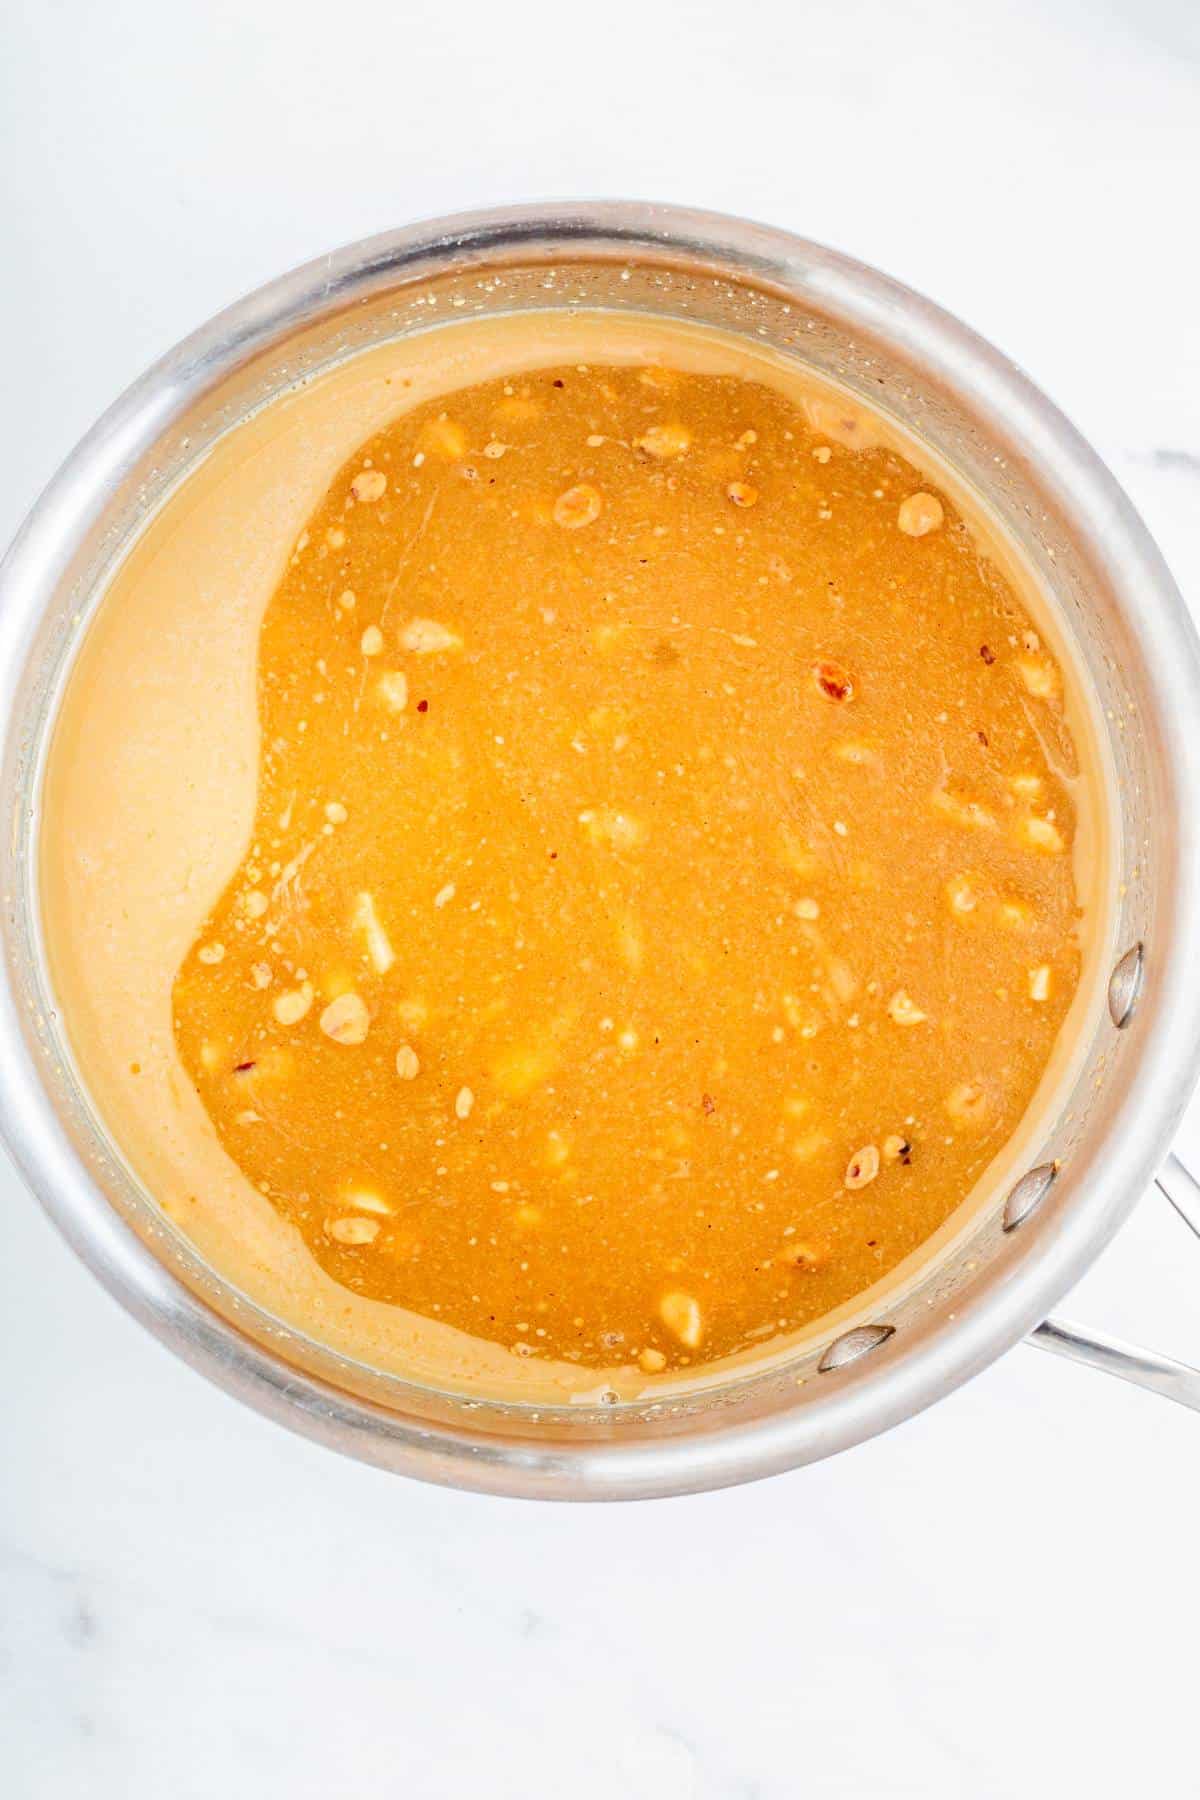
Step 5: Meanwhile, prepare the caramel by adding the coconut oil, maple syrup, and peanut butter into a small saucepan. Melt together on low heat then add the protein powder and stir until combined and remove from heat.
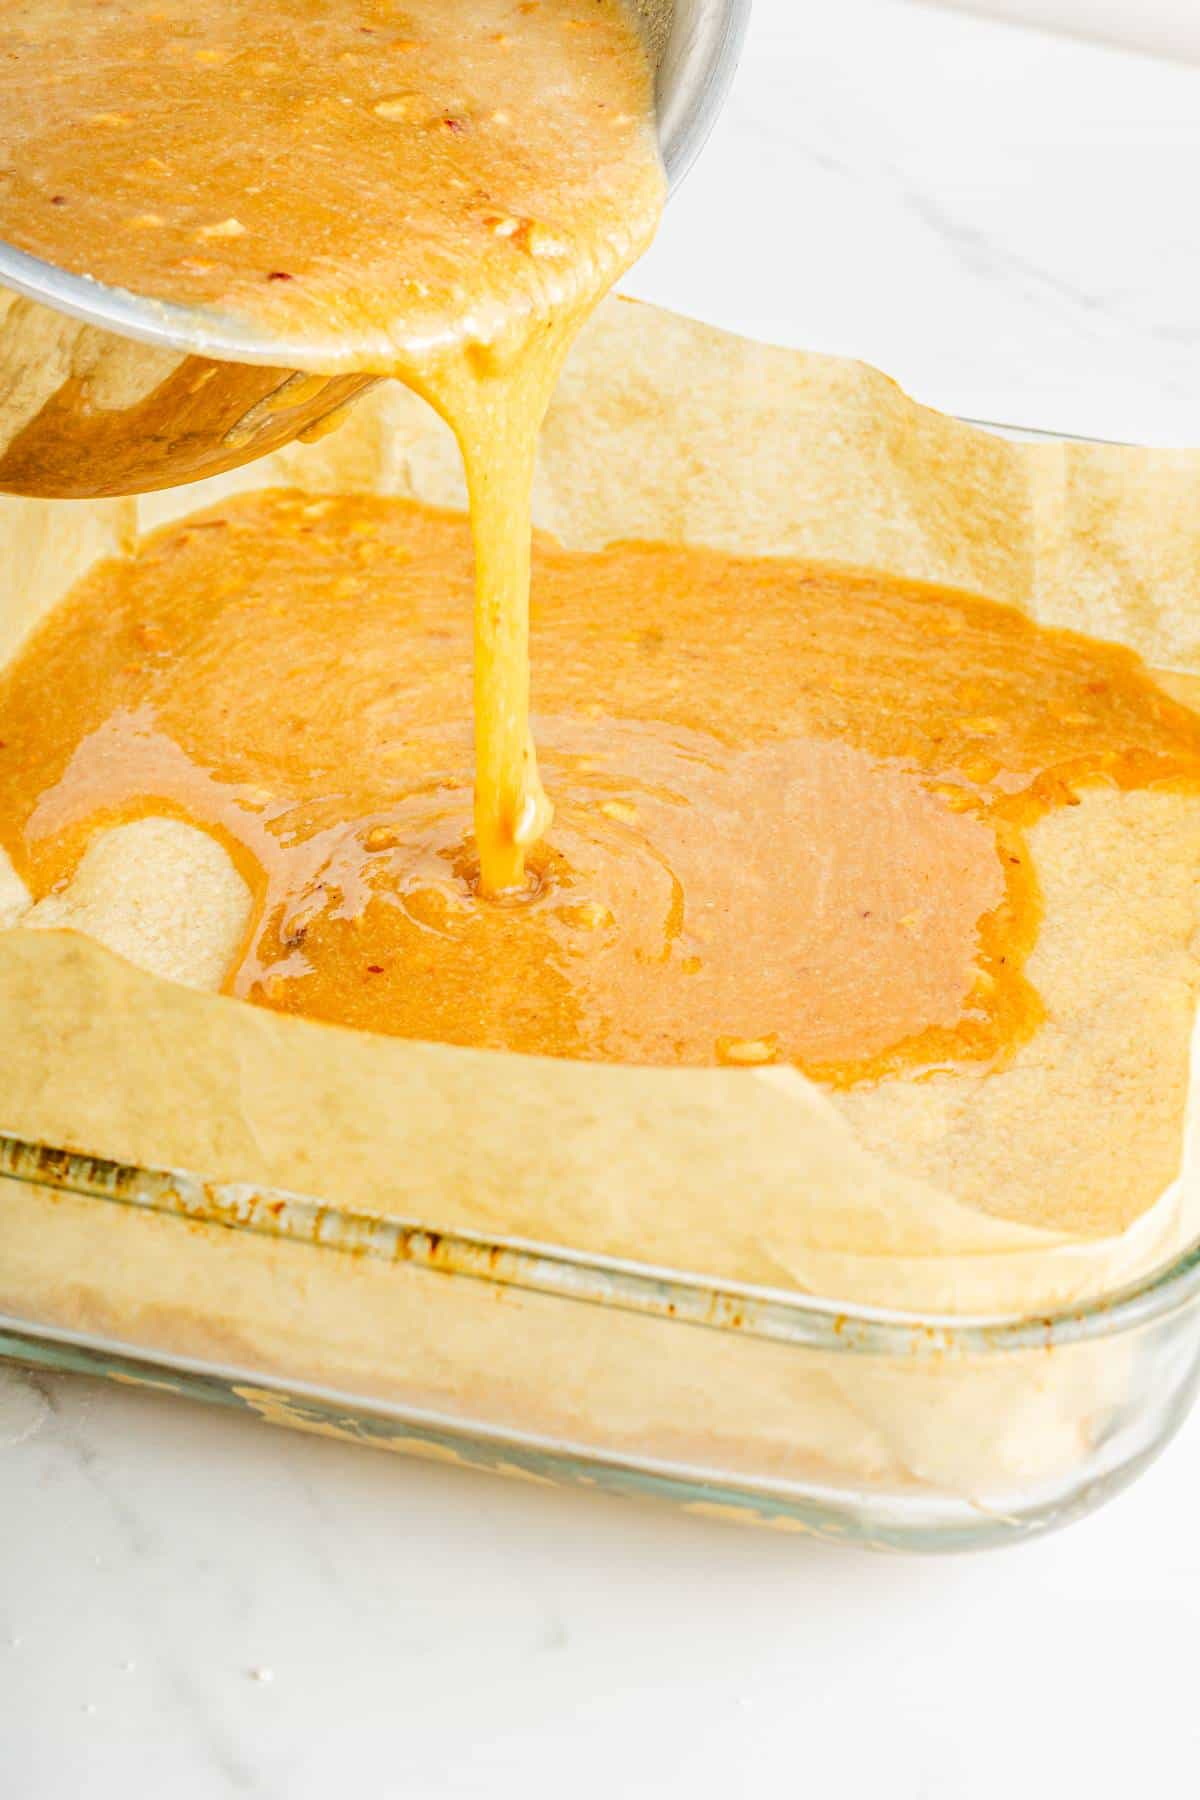
Step 6: Once the cookie base is done, pour the caramel sauce on top of the shortbread layer then place into the freezer. Freeze for at least 2 hours to allow the caramel layer to harden.

Step 7: Once frozen, remove from the baking dish by lifting on the parchment paper. Peel the parchment paper away and cut the cookie into bars, 9 cuts across the width and 3 cuts down the length of the 9×9 inch pan. This will give you the 27 bars, each 3 inches long and 1 inch wide.
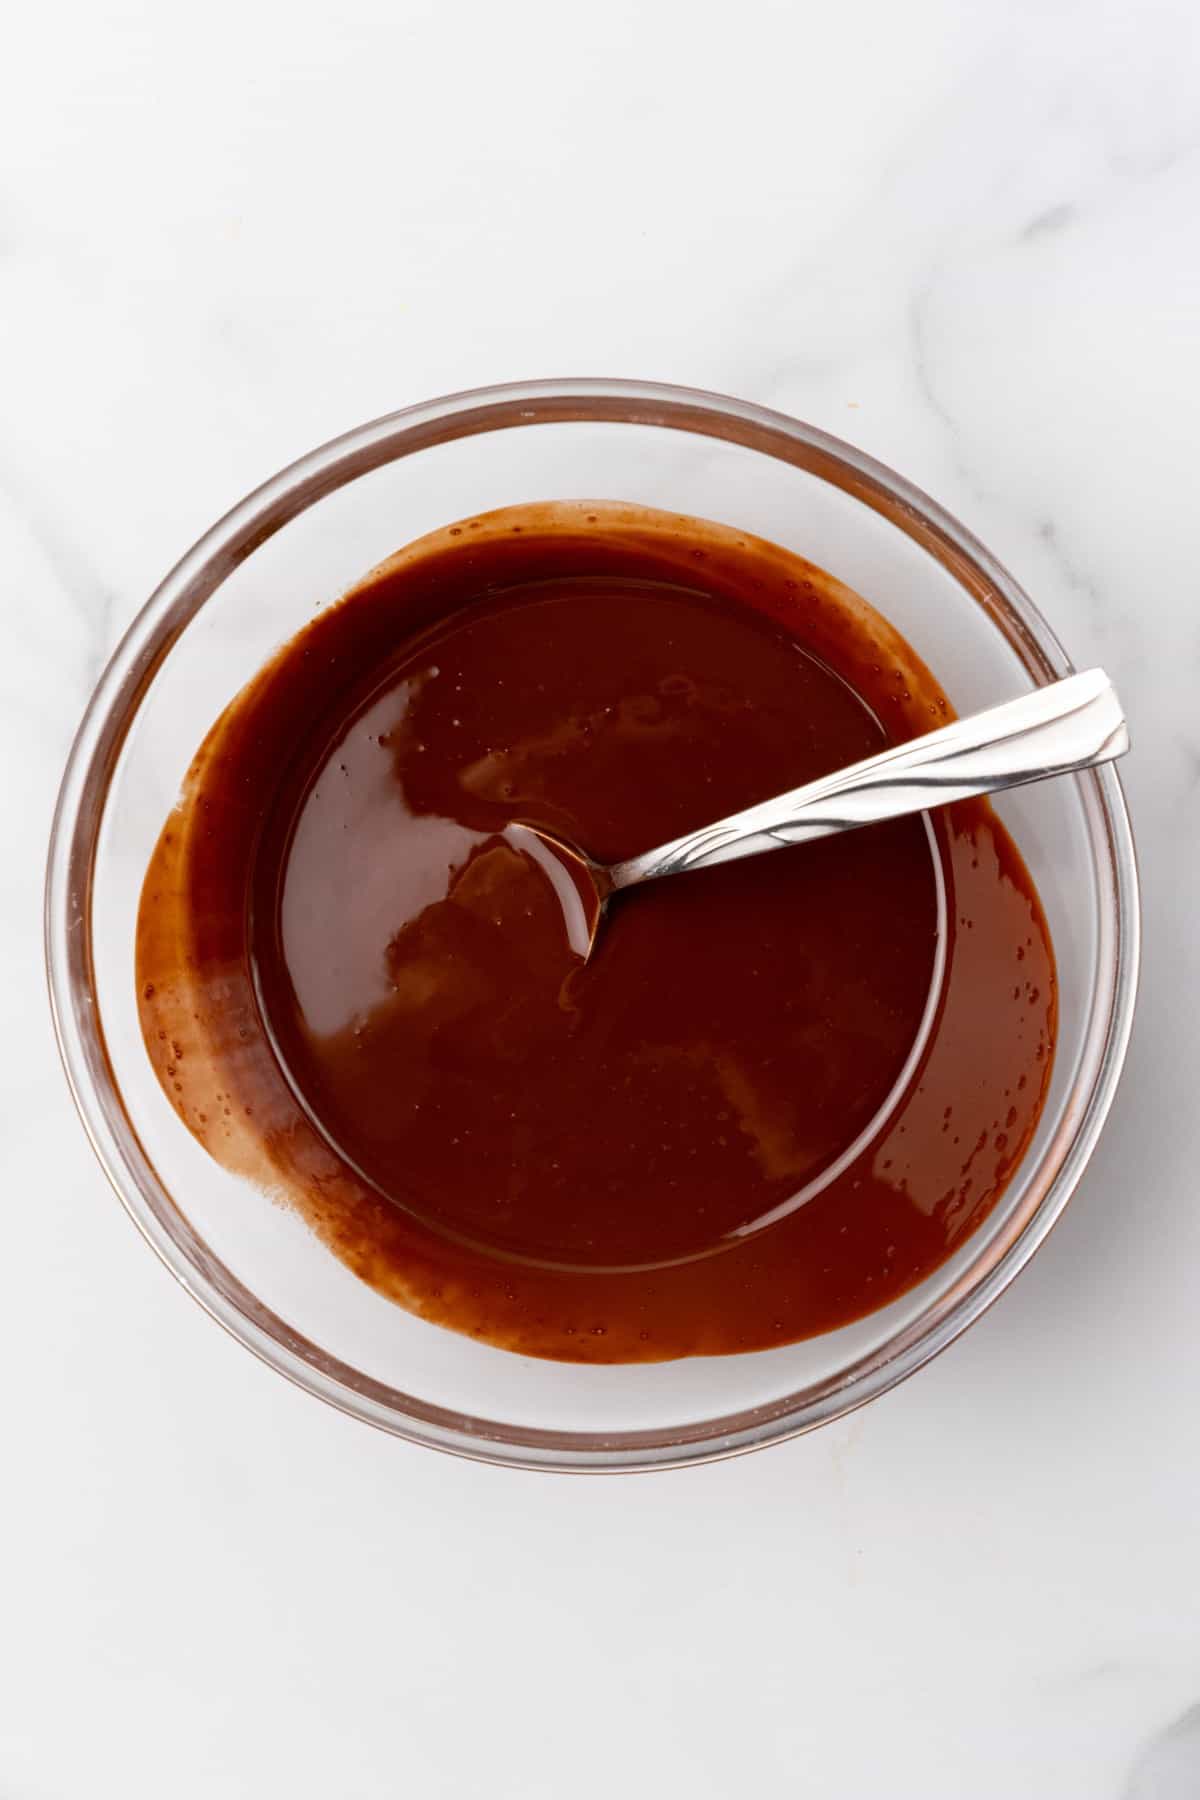
Step 8: Melt the chocolate chips and coconut oil together in the microwave in 30 second intervals or using a double boiler.
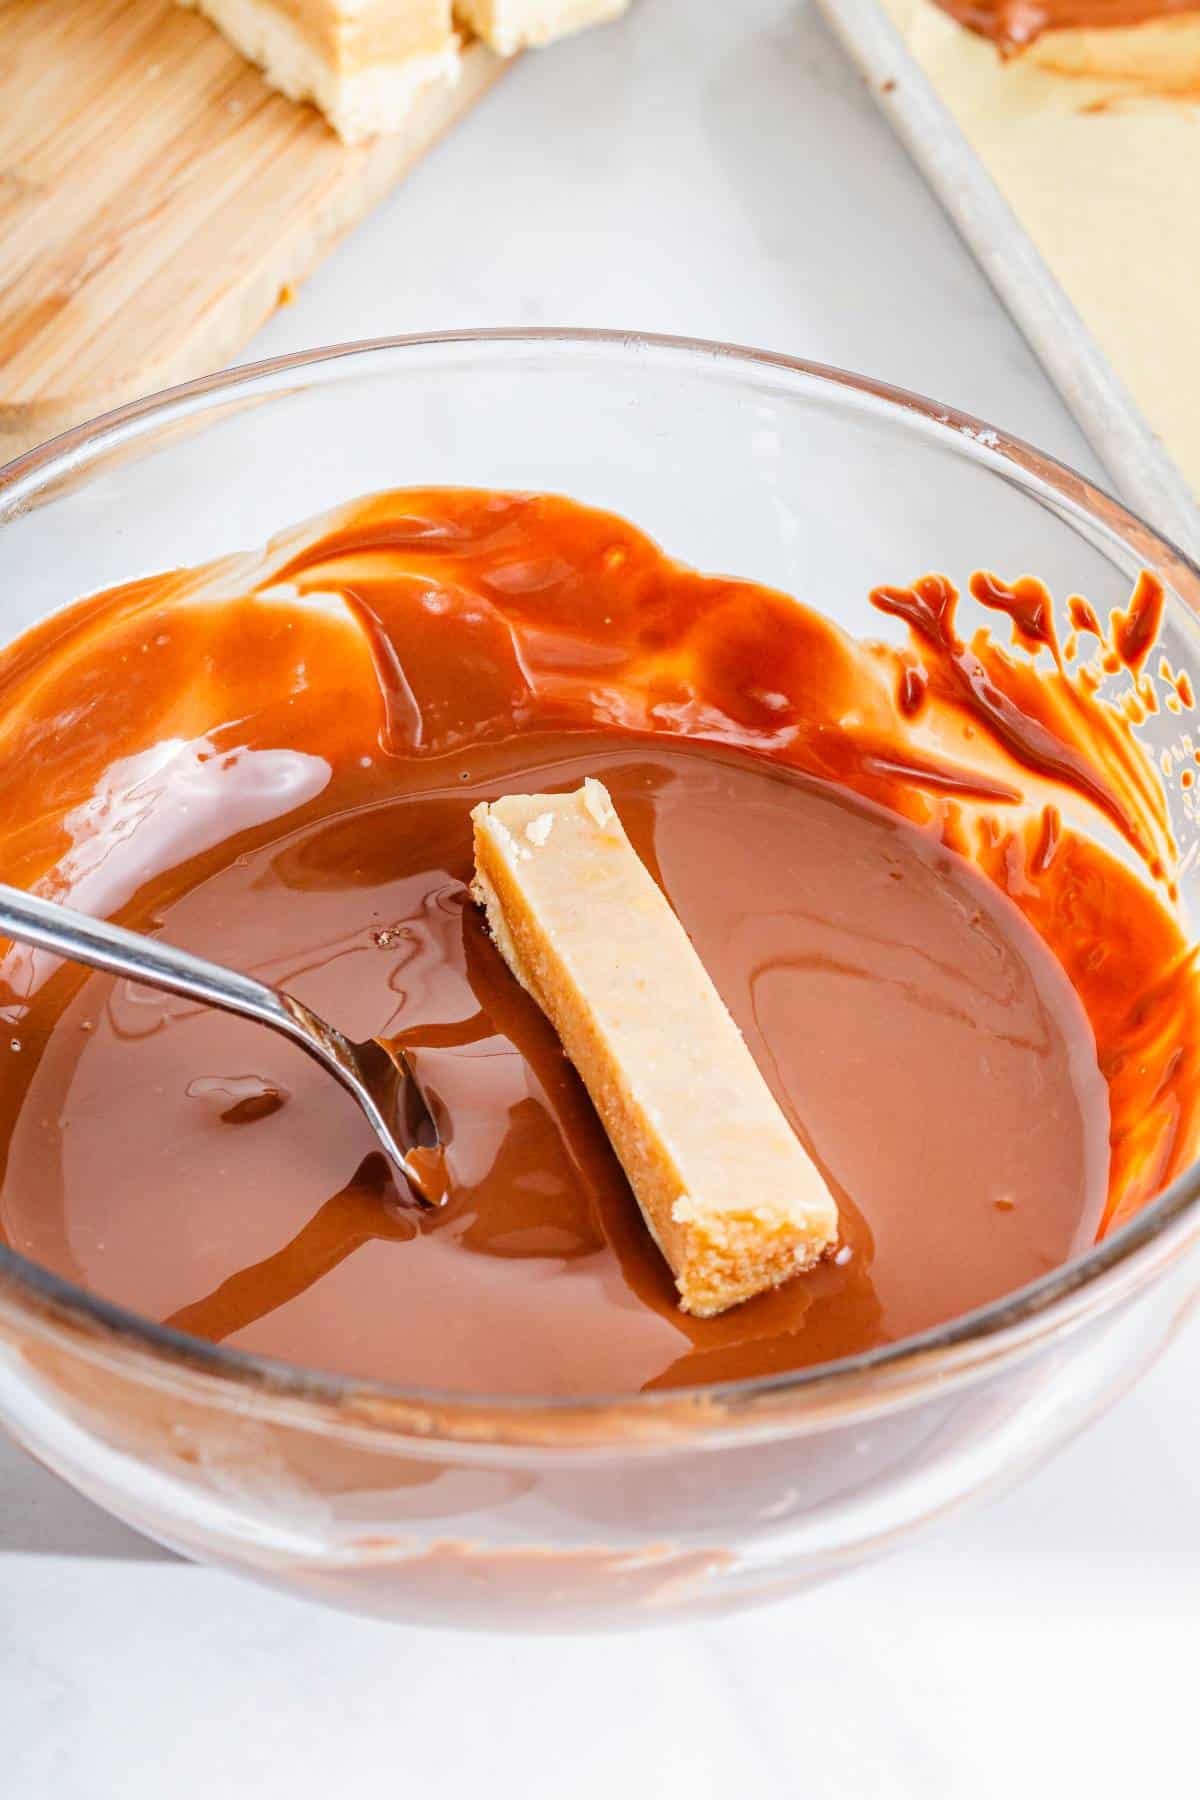
Step 9: Line another baking dish with parchment paper. Dip the cookie bars into the melted chocolate to coat them evenly, then place them on the parchment lined baking dish.
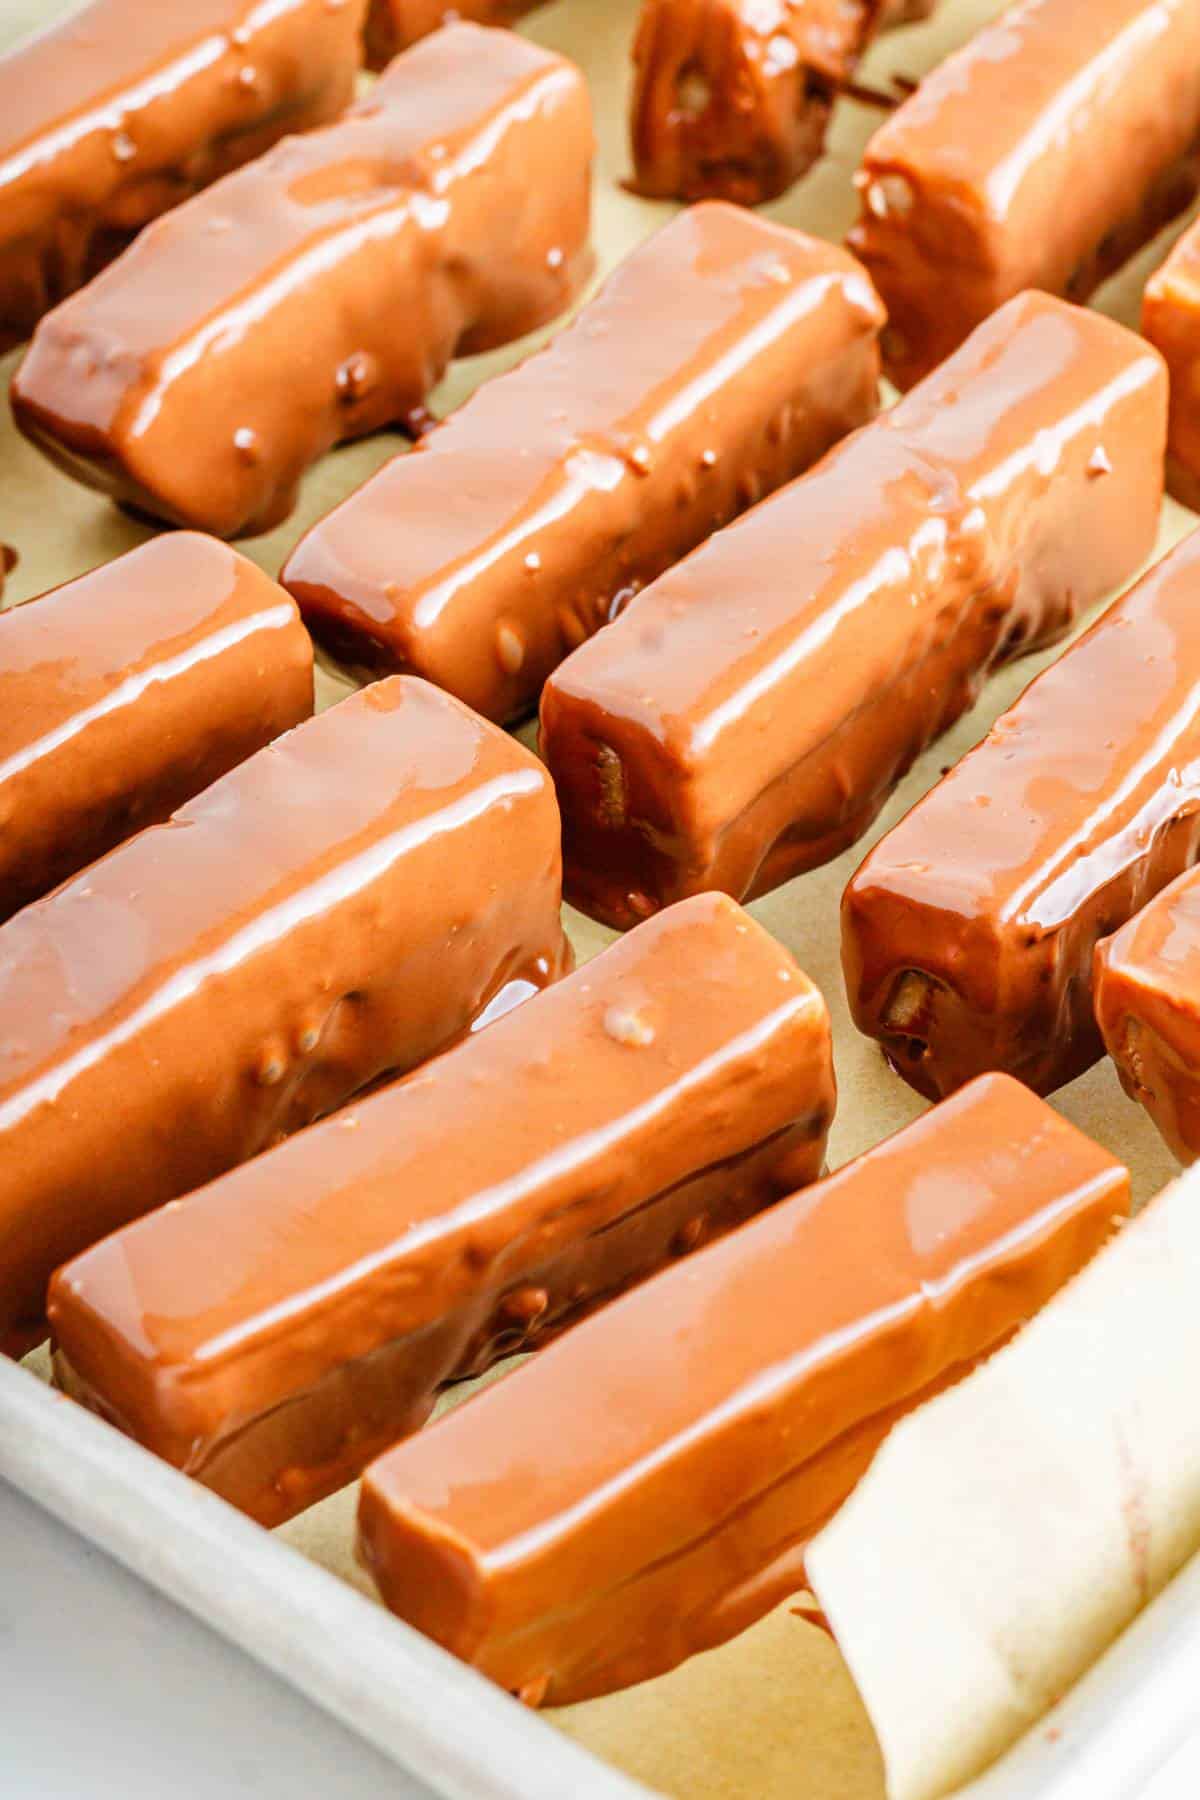
Step 10: Place the coated cookie bars into the fridge for 15 minutes to let the chocolate layer harden, then enjoy!
Recipe Tips and Tricks
When baking the base layer, keep an eye out for the edges to turn just slightly golden. This is the sweet spot where it’s perfectly baked – not too soft, not too crispy.
Make sure to chill the bars long enough so they set properly before cutting.
Use a sharp knife and clean it between cuts for neat, even bars.
Be sure to to use an 9×9 inch pan for this recipe to achieve the desired shape and texture. Using a larger pan could result in bars that are too thin.
If you want to save a bit on calories and sugar, you can just dip the tops of the bars into the melted chocolate, rather then coating them entirely.
Frequently Asked Questions
Store them in an air-tight container n the refrigerator for up to a week. For longer storage, you can freeze them for up to 3 months, making them a great make-ahead treat. Just remember to thaw them for a bit before enjoying, if you’ve stored them in the freezer
While store-bought Twix bars are high in refined sugar and corn syrup, this healthier Twix Bars recipe is a more nutrient dense alternative. It is sweetened with maple syrup, and the inclusion of protein in this recipe makes it a more balanced snack, contributing to its nutritional value compared to traditional Twix bars.
Yes, you can experiment with different flours. If using a gluten-free alternative, ensure it’s a 1-to-1 substitute.
More Healthy Dessert Recipes

Did you try this recipe? Please consider leaving a star 🌟🌟🌟🌟🌟 rating in the recipe card below. Thank you so much!
Healthy Twix Bars
Ingredients
Cookie Base Ingredients
- 1 cup Quest Multipurpose Mix you can also use regular flour
- 1/2 cup vanilla whey protein powder
- 1/4 cup granulated sweetener I used Monkfruit Granulated
- 1 pinch salt
- 1/4 tsp baking soda
- 1/2 cup butter softened at room temperature
- 1 tsp vanilla extract
- 1-3 tbsp coconut oil melted, as needed
Caramel Ingredients
- 3/4 cup sugar free maple syrup I used Lakanto Brand
- 1/2 cup coconut oil melted
- 1/2 cup peanut butter
Chocolate Coating Ingredients
- 1 cup chocolate chips
- 1 tsp coconut oil
Instructions
- Line a 9×9 baking dish with parchment paper and preheat the oven to 350 degrees.
- In a large bowl, combine the flour, protein powder, sugar, salt, and baking soda.
- Add the softened butter and vanilla extract and mix together with a fork until a crumbly dough forms. Add melted coconut oil 1 tablespoon at a time, mixing in between. Add just enough oil until you are able to stick the dough together into one big ball.
- Transfer the dough to the parchment lined baking dish and press the dough down evenly across the pan.
- Place in the oven and bake for 13-15 minutes, until the edges just turn slightly golden.
- Meanwhile, prepare the caramel by adding the coconut oil, maple syrup, and peanut butter into a small saucepan. Melt together on low heat then add the protein powder and stir until combined and remove from heat.
- Once the cookie base is done, pour the caramel sauce on top then place into the freezer. Freeze for at least 2 hours to allow the second layer to harden.
- Once frozen, remove from the baking dish by lifting on the parchment paper. Peel the parchment paper away and cut the cookie into bars, 9 cuts across the width and 3 cuts down the length of the 9×9 inch pan. This will give you the 27 bars, each 3 inches long and 1 inch wide.
- Melt the chocolate chips and coconut oil together in the microwave or using a double boiler.
- Line another baking dish with parchment paper. Dip the cookie bars into the chocolate to coat them evenly, then place them on the parchment.
- Place the coated cookie bars into the fridge for 15 minutes to let the chocolate coating harden, then enjoy!
Notes
Nutrition
The nutritional details for recipes are estimated using MyFitnessPal and can vary with different products, measurement accuracy, and source reliability. We aim to provide accurate information but cannot guarantee the precise accuracy of the nutritional data
No joke these are better than regular Twix bars. Amazing!